
Learning our Kiln: Reflection on the Fourth Firing of the St. Augagama
Having recently unloaded the fourth firing of the St. Augagama, some decisions are becoming clearer while others will still require another set of elaborate test tiles (ie. another load of pots). This firing gave me enough confidence to settle on a final recipe of my clay body, furthered my testing of glaze combinations, and produced a few results that will take more work to understand. It also included the collapse of two shelves in the front stack which landed in the firebox. There was plenty to consider while unloading!
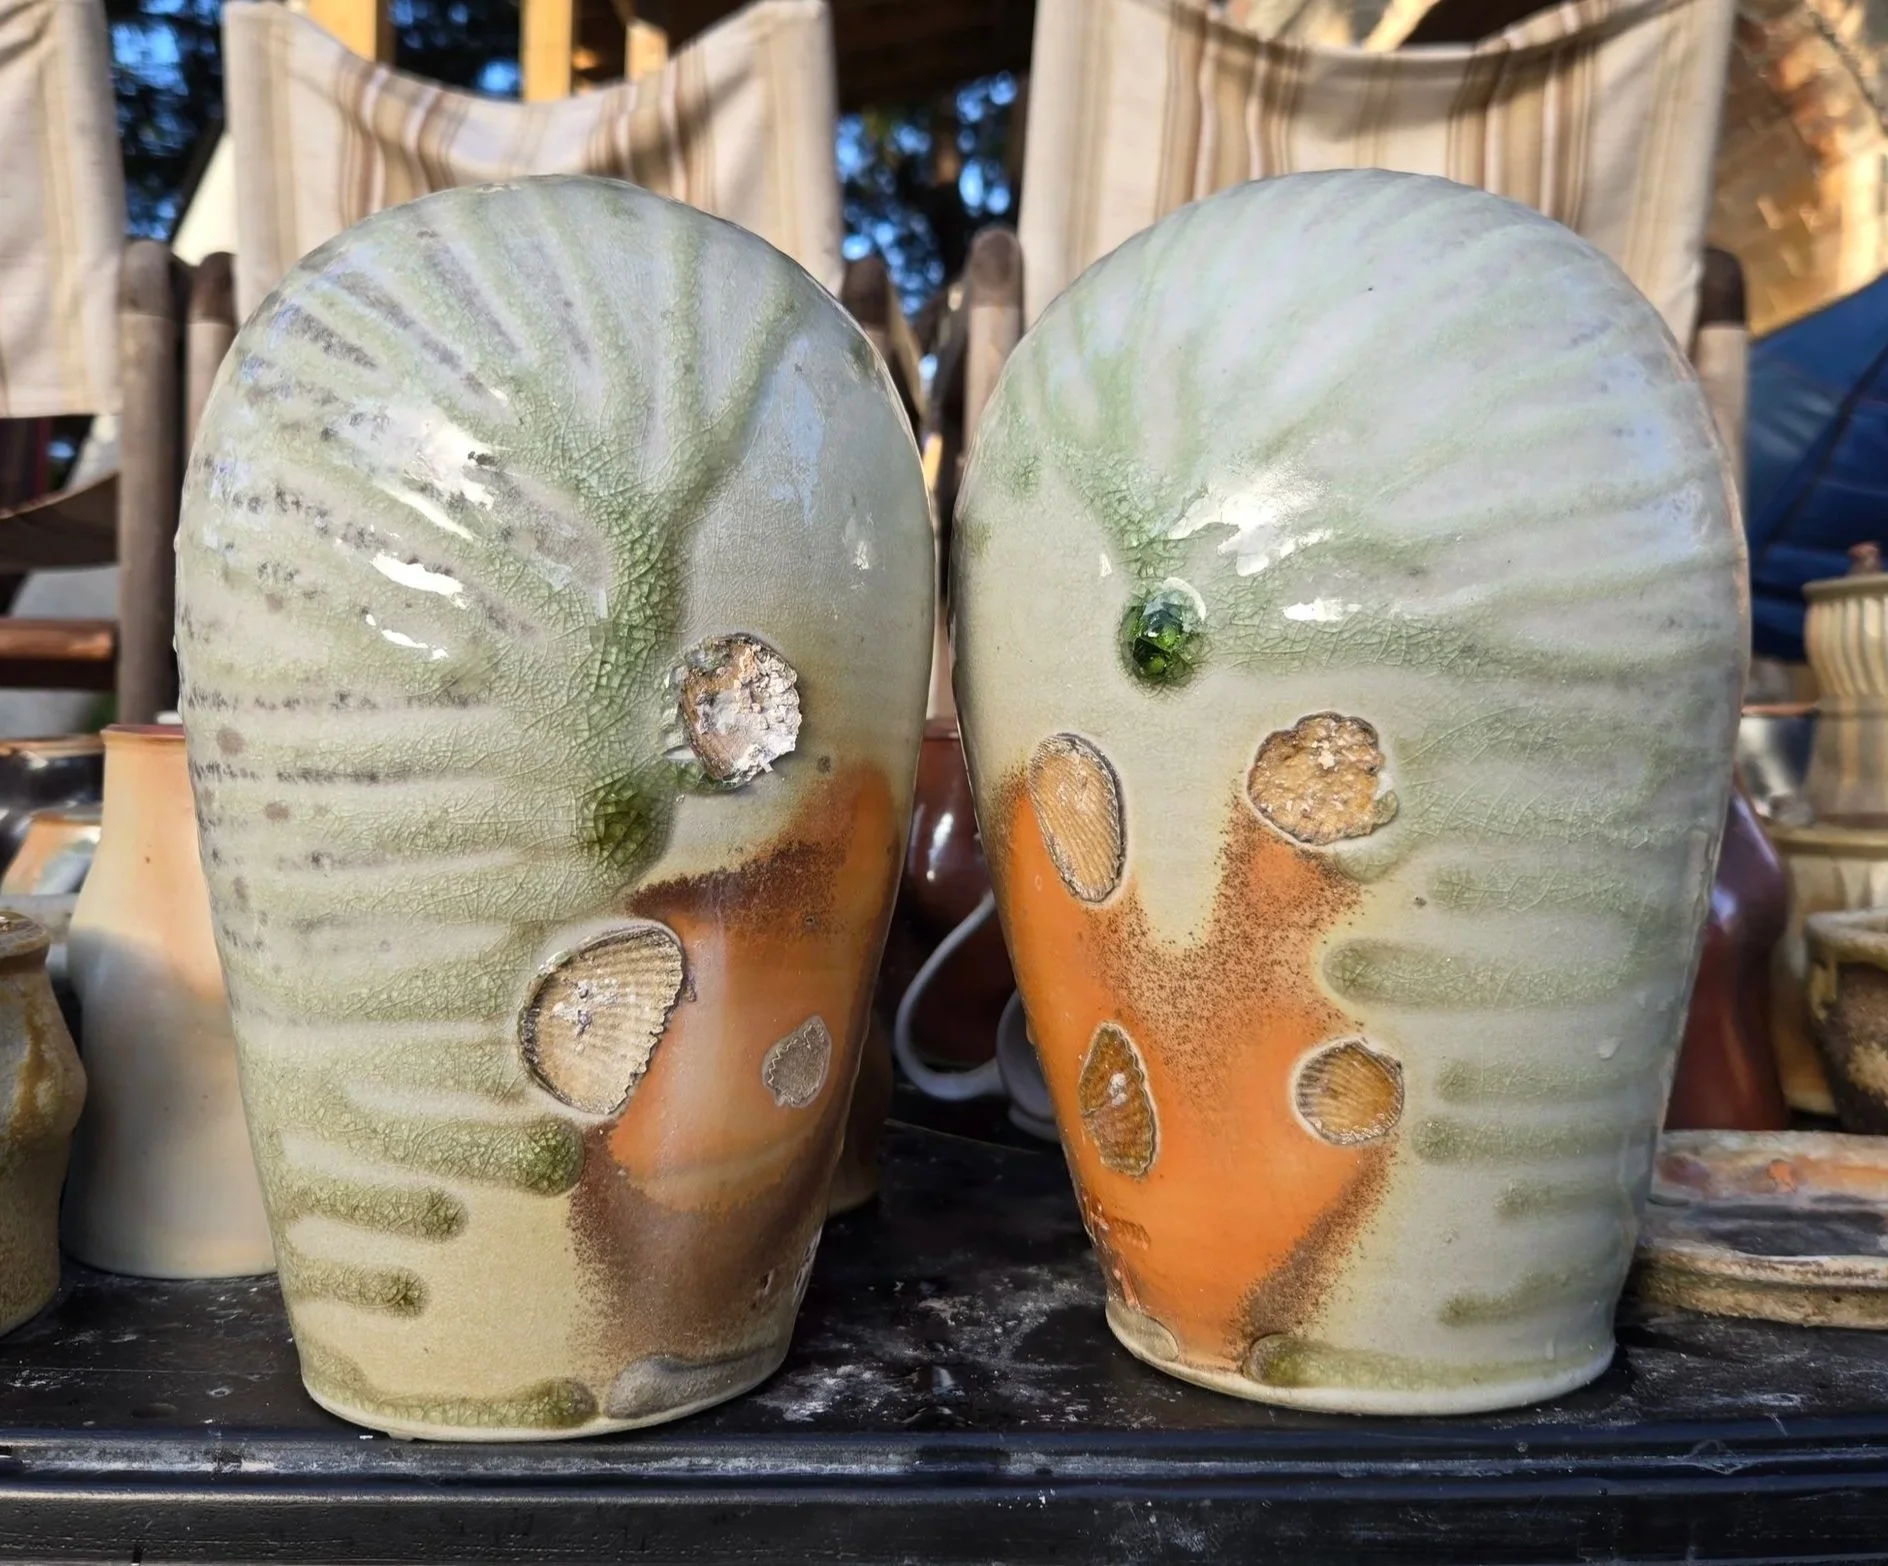
SWS Woodfire test recipe number 6 and 7.
Much of my energy recently has been dedicated to refining the working properties of my woodfire clay body. The two side-fired closed forms pictured together are recipe number 6 on the left and number 7 on the right. Both were fired raw and produced rich green ash accumulations, warm flashes on the undersides, and residual shell marks from the side-firing. For those unfamiliar with woodfiring, firing the pieces on their sides allows the movement of the ash glaze to cross the thrown form. Once upright, the pots retain that evidence of their placement. The two forms are visible in the image of the front stack about halfway up the stack.
After comparing the fired results with how each body handles on the wheel, I have finalized number 6 as the SWS Woodfire recipe I will move forward with. Its combination of throwability, ash-glaze response, carbon trapping, and non-ash color palette gives me what I have been looking for. A clay body has to work well through the whole process and I spend considerably more time making a pot than looking at it after it is fired, yet the fired result often carries a disproportionate weight when establishing the quality of a clay body.
Settling on this recipe gives me resolution as I prepare for my next cycle of making. There are already enough variables in woodfiring. Becoming familiar with one clay allows me to make more deliberate decisions about form, placement, and surface. Also, I am uniquely opposed to flashing slips and terra sig. For me it is one more thing to go wrong and I would much rather work with a body that looks good all by itself.
Glaze exploration also continued, and I am pleased with how good the glazed work looks in this kiln. The entire third step is reserved for glazeware (6 feet from the firebox). That is an intentional part of how I use the space: work placed there will look good without depending on substantial fly ash reaching it. The ash and soluble fluxes that do reach the work emphasize alterations, gather around textural changes, and create color shifts across forms. The results from this load reinforce the value in developing those relationships between the applied glaze and the form beneath it.
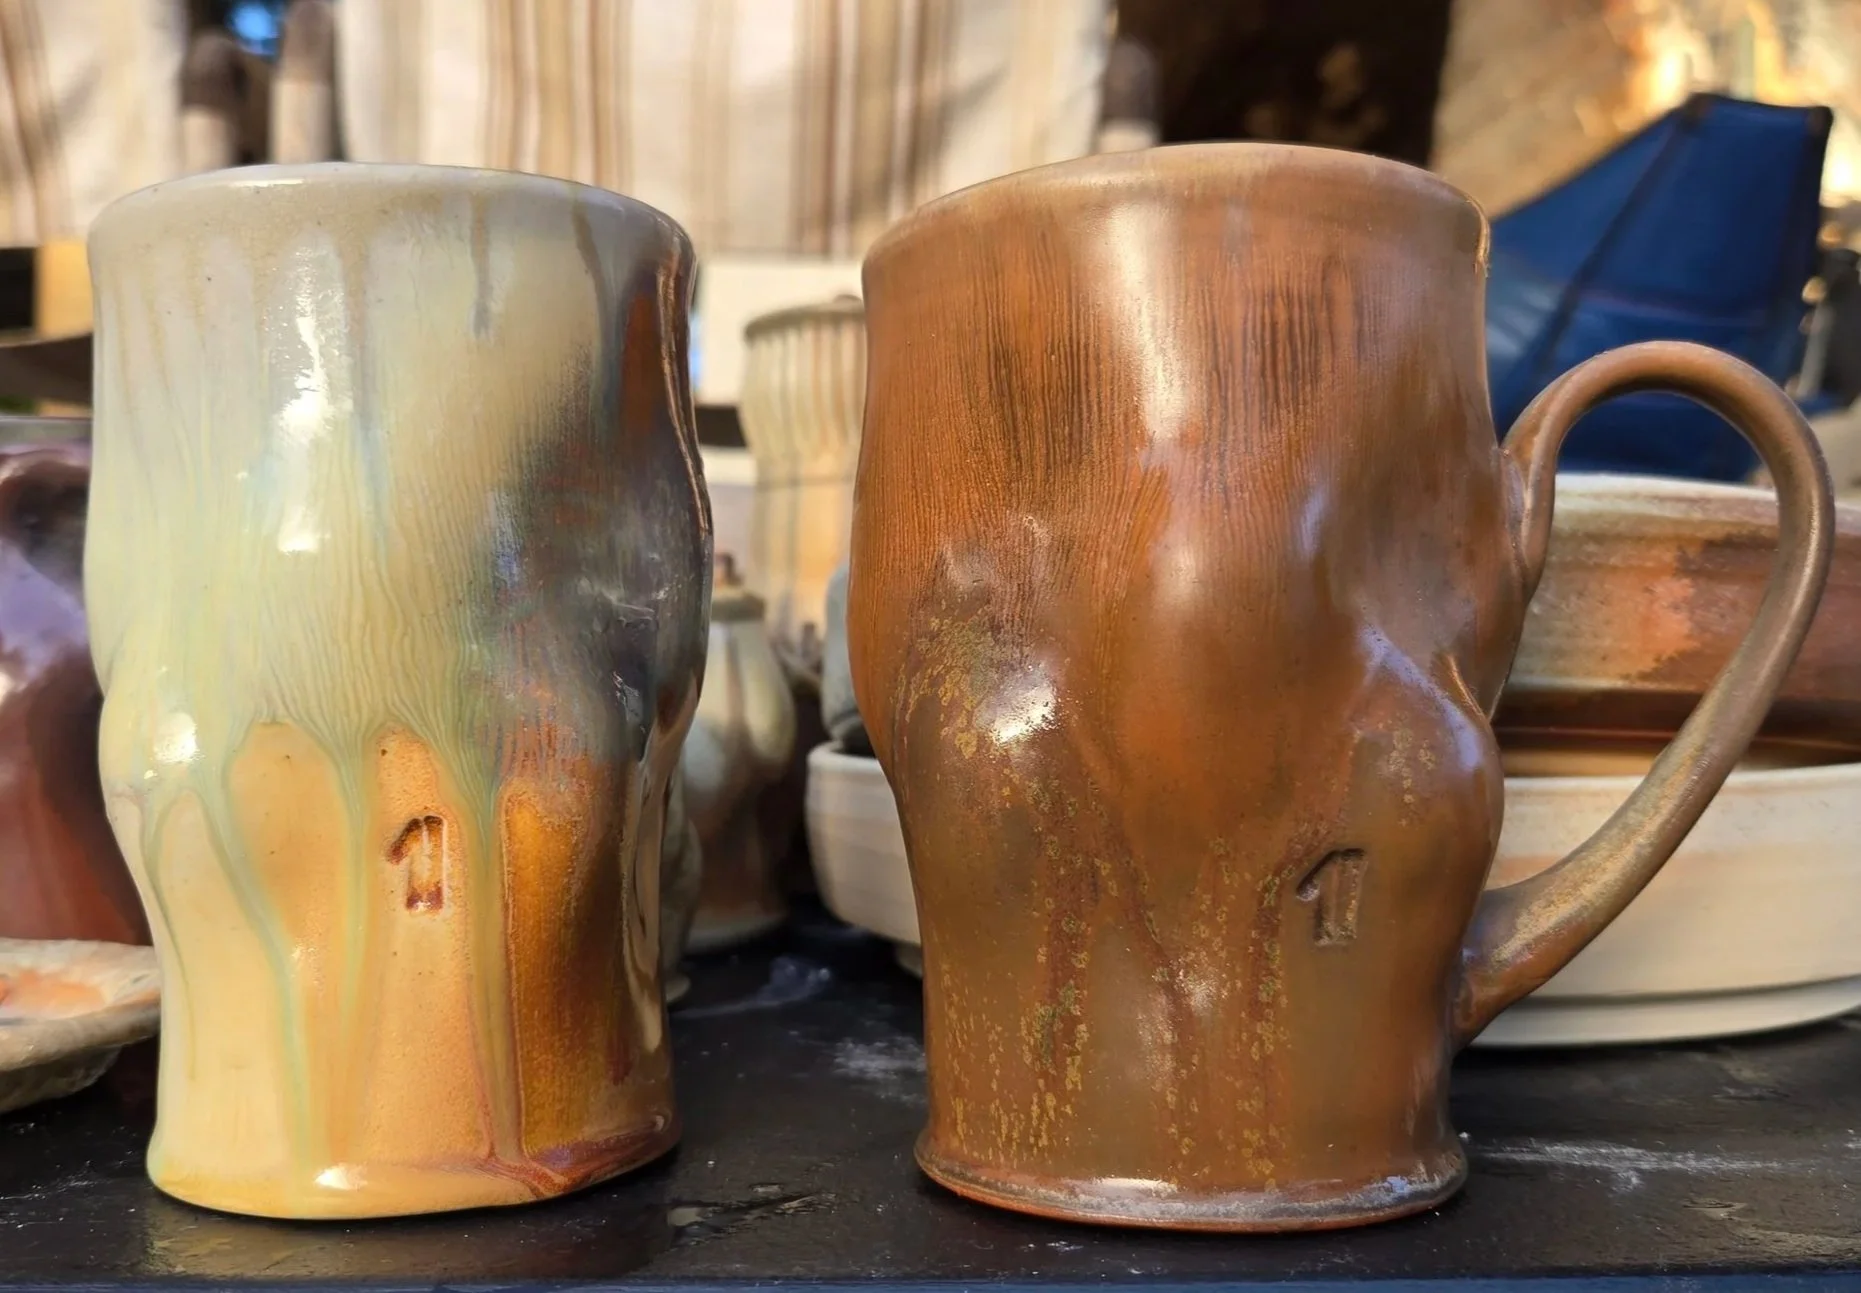
Pair of cups with layered glazes and natural ash effects.
The two cups pictured side by side offer a particularly useful comparison. Both were glazed with the same combination, but the cup on the left was fired in the salt chamber and the one on the right was from the main chamber. We sprayed in five gallons of ocean water intermittently over a little more than an hour. The pale, flowing surface of yellow-orange, flashing blue crystals, and glaze runs differ substantially from the warm brown surfaces of the cup on the right. Also, the cup on the right was more fully cooled in a light reduction while the salt chamber (closer to the chimney) slow-cooled but in a more-oxidized atmosphere.
Seeing them together makes the role of the firing difficult to overlook. The glaze recipe is only part of the information needed to understand the finished pot and these will remain useful teaching comparisons.
One of the stranger results was a cranberry-red variation of TM Green Celadon. In the photograph of the stack, the cup is still in-situ near the floor, with red developing across its lower portion and a pale green surface above. That area of the kiln was largely oxidized, which makes this particular result especially curious as I am hesitant to categorize this as a copper-red since the pigment is a mason stain. The phenomenon was documented, and the color is certainly worth trying to understand. I may pursue it later but it does not excite me as much as other surfaces right now.
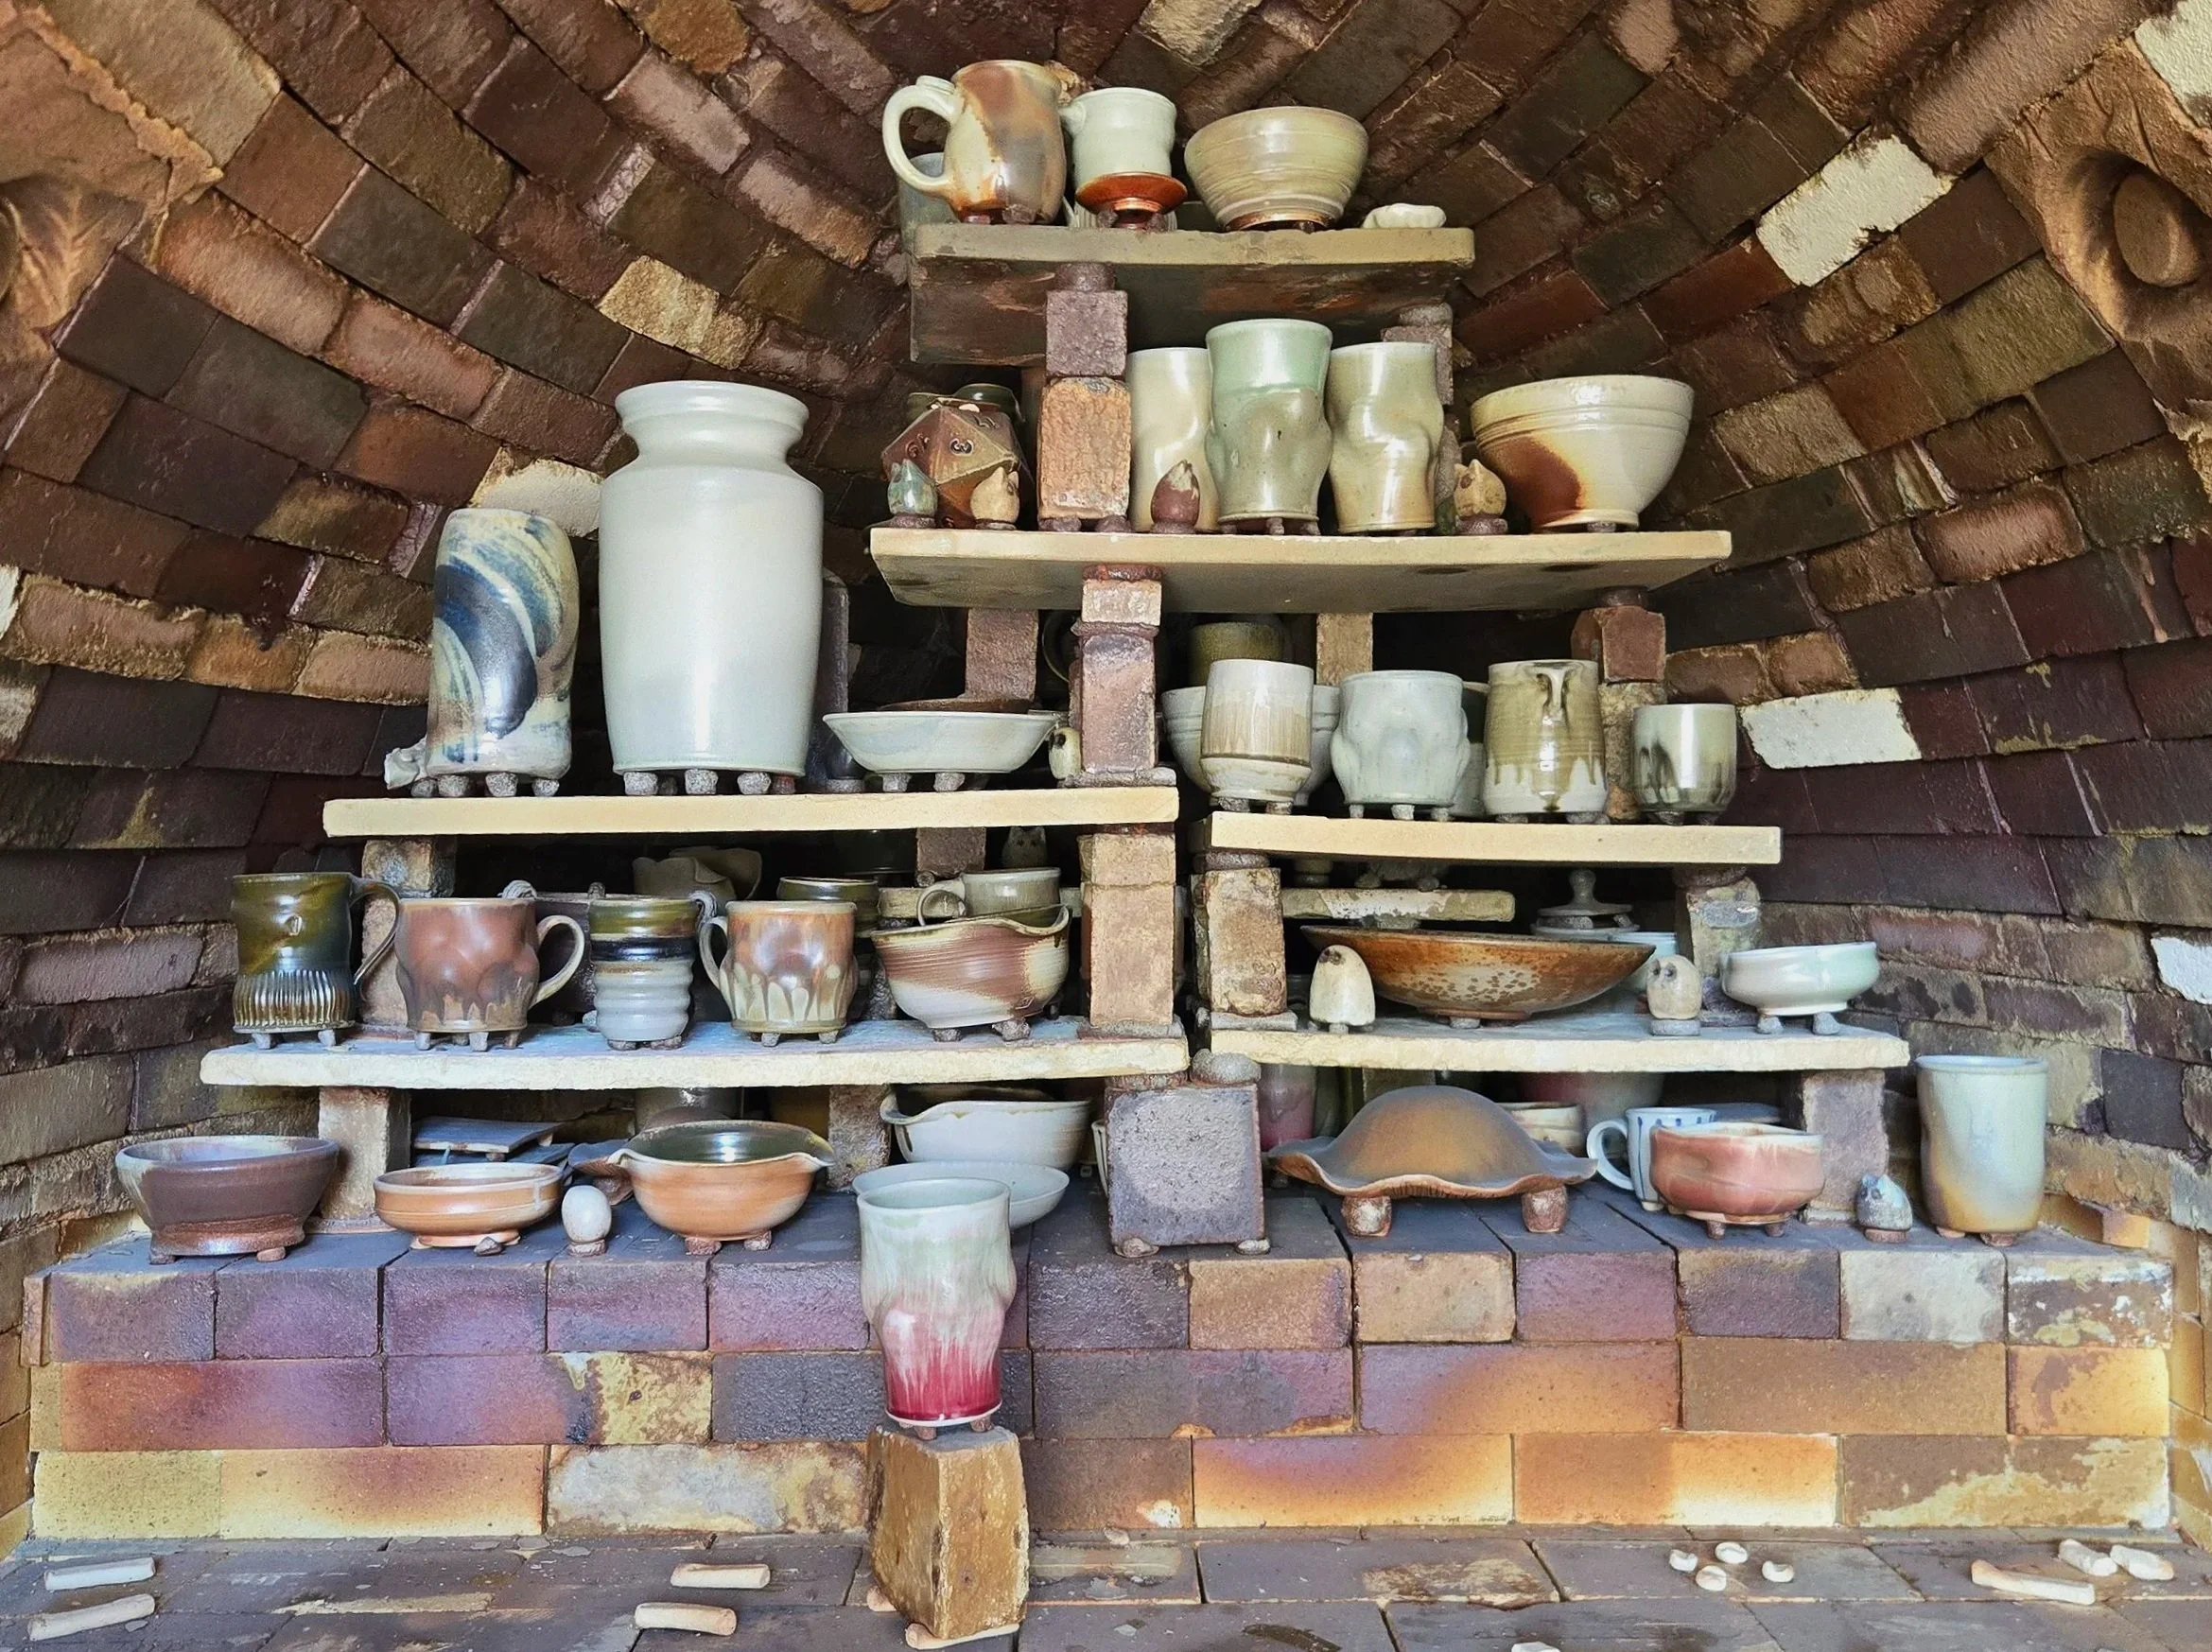
Face of 3rd step with TM Green cup on a riser on the second step showing oxidation/reduction line.
The firing also provided a less welcome surprise when two shelves collapsed in the front stack. Fortunately, the collateral damage was minimal, and a good portion of the work involved actually survived. The collapse happened while the pots were pyroplastic (meaning softened by the heat) and they fell into a comparatively soft coal bed. Those circumstances appear to have helped spare work that might otherwise have broken. The work on either side of the firebox was also untouched, which is also surprising.
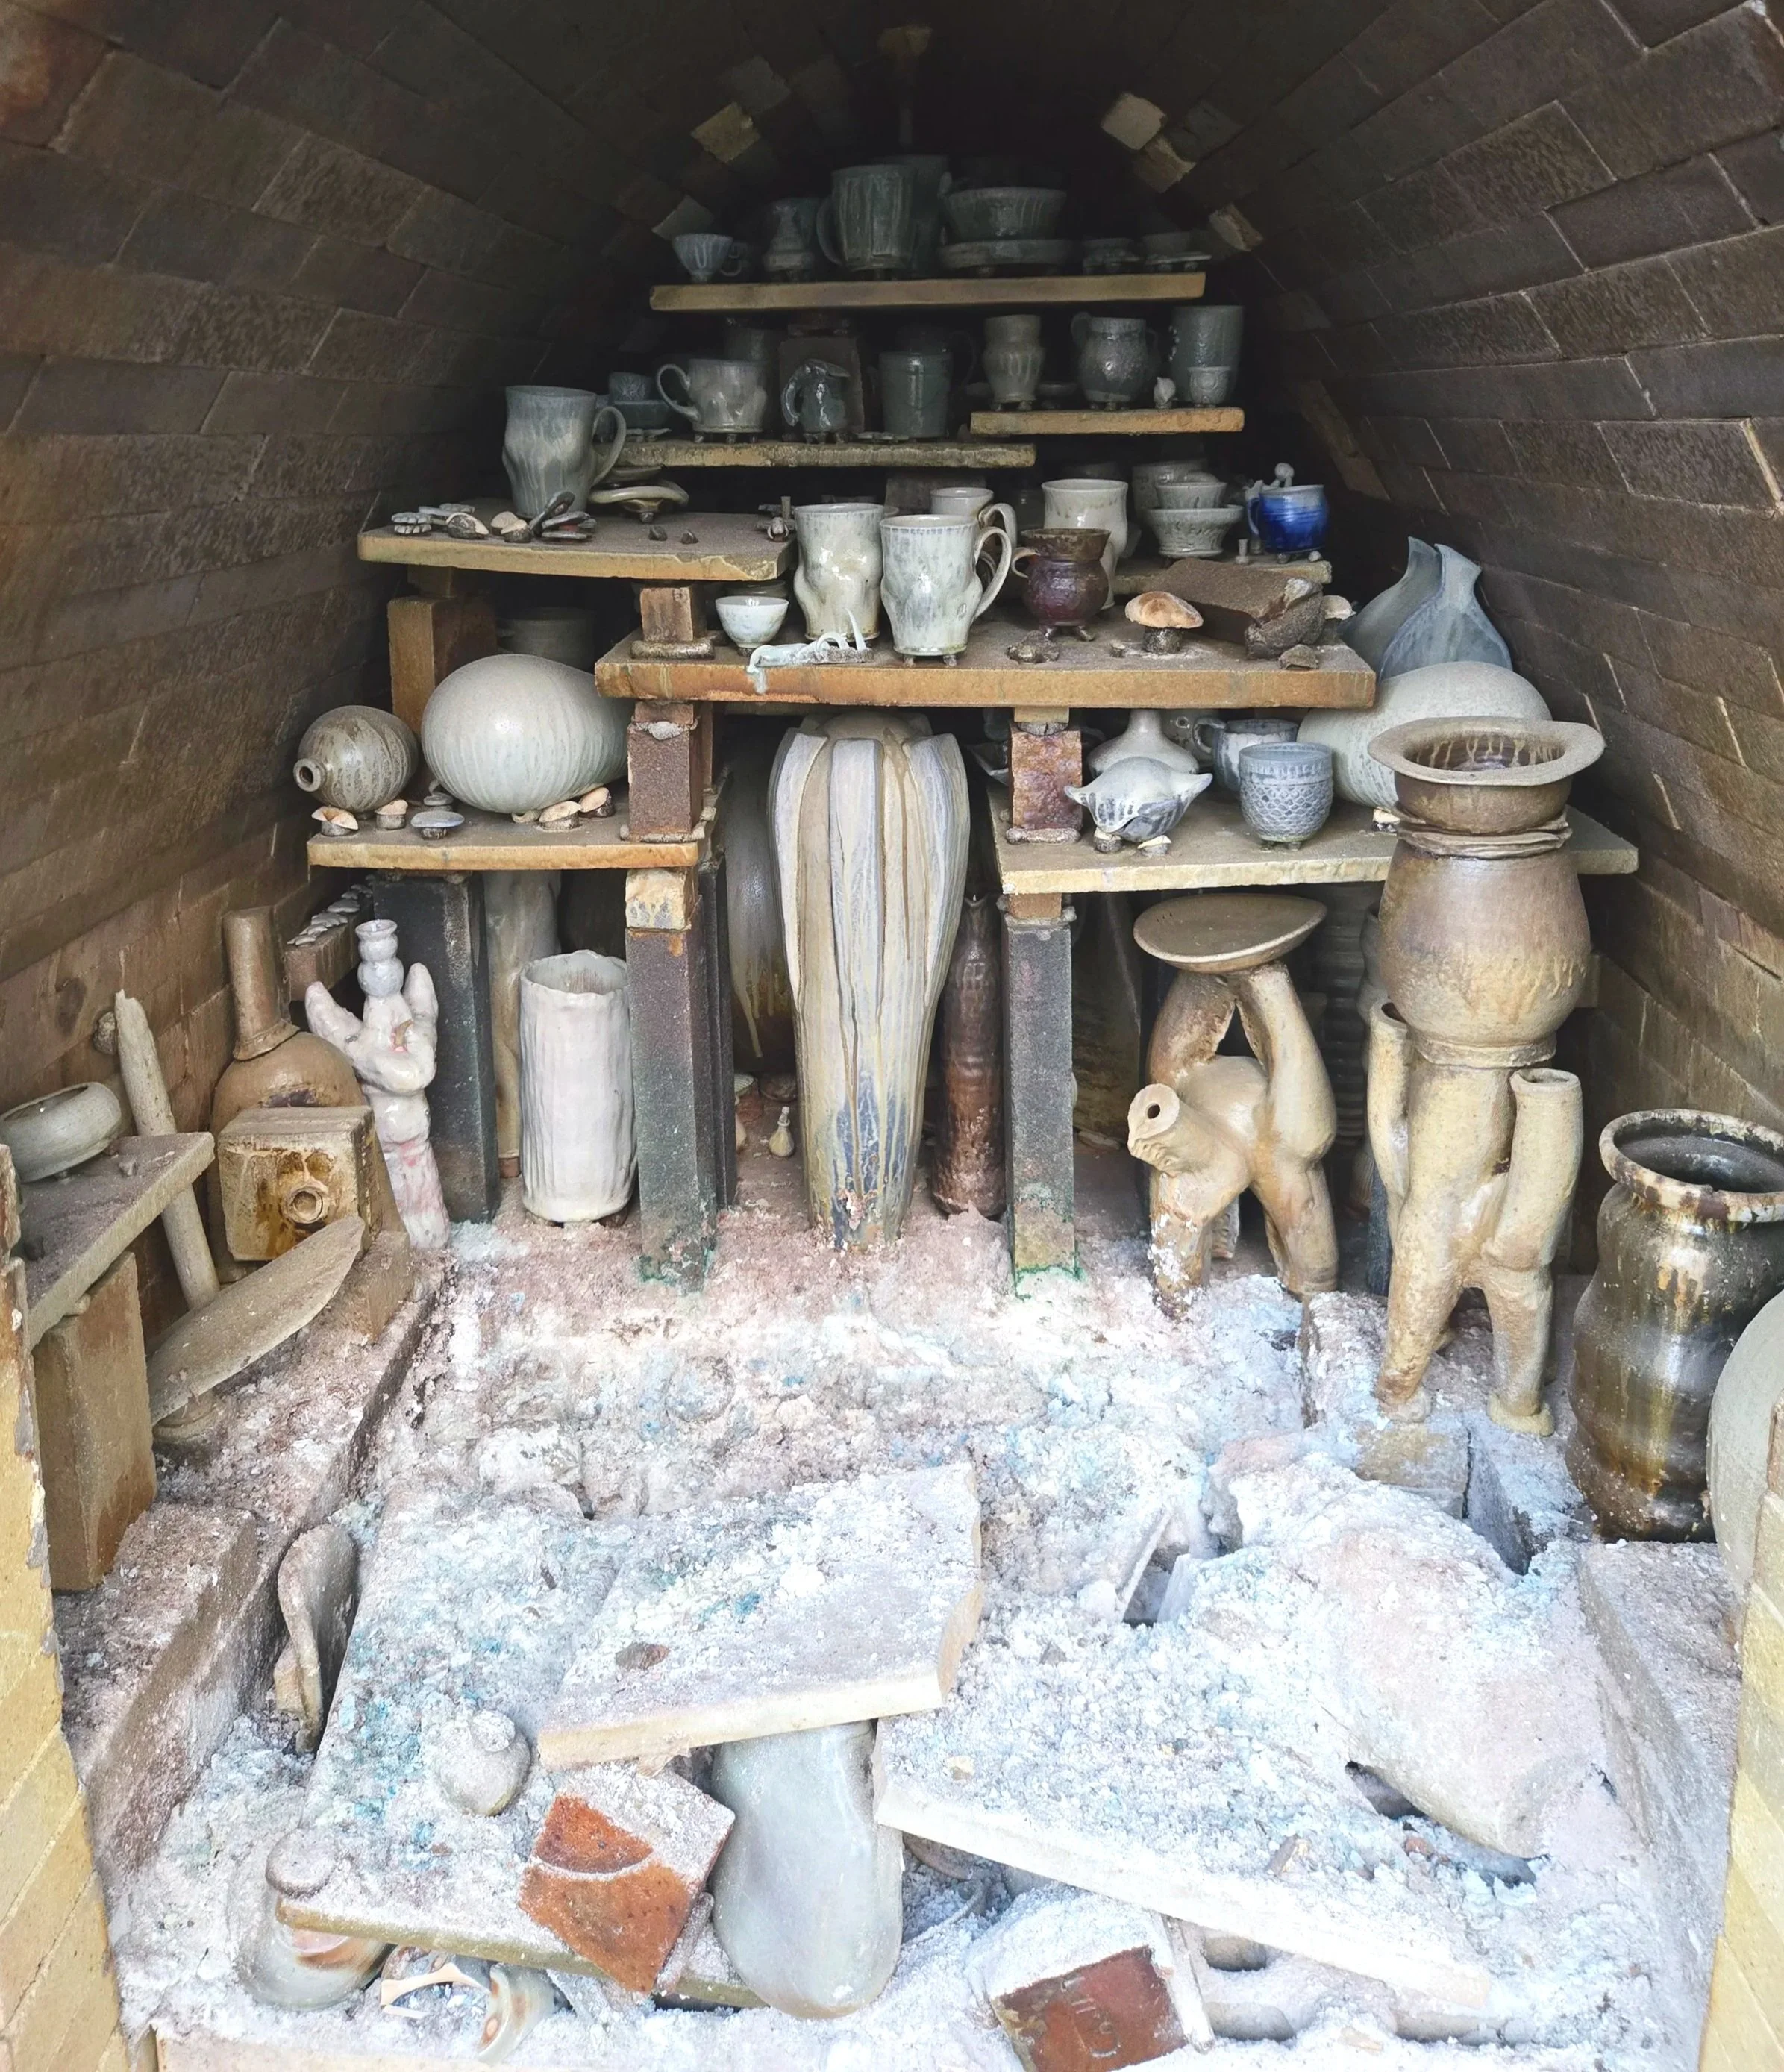
Firebox and first step of the 4th Firing of the St. Augagama.
There is a practical responsibility in evaluating that failure alongside the successes. The next loading needs to account for what happened. As near as I can tell, the wadding under the posts was a little on the thick side. As it shrank during the firing, the balance changed and tipped the shelves full of work into the firebox. The surviving pots are fortunate, but their survival does not mean it was “all ok” in the end.
What I value about this fourth firing is the increasingly specific direction it gives my own work and my leadership of the kiln.
Thank you to everyone who contributed work, time, and attention to this firing. Learning a kiln is shared work, and each load benefits from the observations of the people who help bring it through.
Our next firing is in February, and reservations are now live. I am looking forward to returning to these questions with another kiln full of work.